Trotec Job Control receives print jobs from image editing software and allows them to be arranged on the bed of the laser cutter for cutting and engraving.
Connecting to Job Control
When Job Control is first started, it is not in communication with the laser cutter itself. Click the “Connect” button to establish communication with the laser cutter.

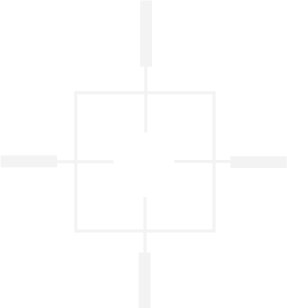
Once connection is established, the current position of the laser will be visible in the plater window as a crosshair, and the “Connect” will change to a “Play” (cut) button.[get image]
Jobs that have been sent to Job Control are visible in the “Jobs” panel on the right hand side of the interface.
If your job is not visible, the job list may have a filter applied. If a filter has been applied, the “Duration” text next to the file name will be underlined. Click this text to remove the filter.

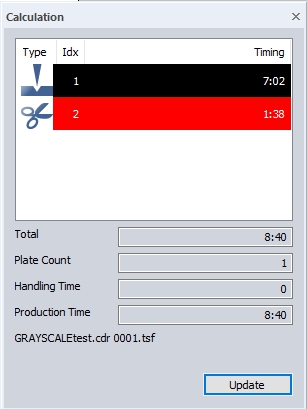
The job list can be sorted by a number of parameters, including name, date, and resolution. Selecting a job from the list will display a figure in the “Calculation” window, providing an estimate of the engraving time (in black, engraver icon), and the cutting time (in red, scissors icon).
Plating your job
Drag your job from the “Jobs” panel to the plater window to arrange it on the bed of the laser cutter. Plating a job sets the material property settings used for all jobs positioned on the plate. This means that multiple jobs using different material settings cannot be cut at the same time.The first job that is plated will determine the material settings for any additional jobs that are plated afterwards.
Jobs can be positioned in a number of ways
- By eye, by simply dragging the job to the desired location
- Snapped to the current position of the laser. Any corner of the job will snap to the crosshair’s current location
- Using the control boxes in the menu, with the job selected. This allows you to enter exact coordinates. The top left corner of the job will snap to these coordinates.
Positioning the laser from job control
While the laser can be positioned manually using the controls on the machine itself, it can also be positioned from within the Job Control software. The X Y Z boxes in the information toolbar show the laser’s current position.
Changing these values and clicking the XYZ arrow button will cause the laser to jump to that position.
N.B. Use caution when modifying the Z value. This value controls the distance between the laser and the bed, and should be set by manually focusing the laser. It is best to leave this value unchanged, only modifying the X and Y coordinates.
Adjusting material parameters
The material parameters included in the job can be changed before cutting using the Job Control toolbar. A different material may be selected entirely, or the parameters of the currently selected material may be adjusted.
Parameters in black control engraving properties, and consist of:
- P power
- v velocity or engraving speed
- and PPI Engrave, the resolution of the laser pulses
Parameters in red control cutting properties, and consist of
- P power
- v velocity or engraving speed
- and Hz/PPI Cut, the frequency of the laser when cutting
Any changes made to the currently selected material can be reverted with the “Undo” button, or applied to the stored material settings with the “Save” button.
N.B. Do not overwrite stored material parameters. They are set up after extensive testing for specific uses. If you wish to fine-tune material parameters for your specific use case, make a copy of the original material and modify that.
N.B. Remember that for best results, images should be engraved at a PPI that is the same or a multiple of the image’s engraving resolution. The “PPI Engrave” box allows you to adjust this property. The job’s resolution can be seen in the “Jobs” panel.
Job Status
A job’s current status is indicated in the plater window by tone:
- Gray: Active job ready to be cut, not currently the active selection
- Black: Active job ready to be cut, currently the active selection
- Blue: Job actively being engraved (only visible when the machine is running)
- White with Grid: Completed/aborted job.
Jobs that have been flagged “complete” are ignored by the laser. It is therefore possible to leave completed jobs on the plater alongside newly added jobs without worrying that they will be cut a second time. This can be useful, for example, for positioning separate jobs relative to each other
Repeating Jobs and Cut lines
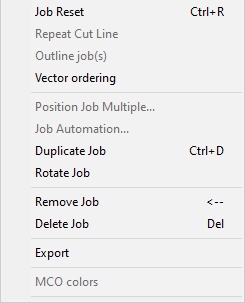
If a job is not engraved to a satisfactory depth on the first pass, the job can be repeated. Right click the completed job and select “Job Reset”, or use the hotkey “Ctrl-R”. The job will be returned to its original state, and can be cut again. The material parameters of the job can also be adjusted between passes.
N.B. This will also reset any cut lines. If a job contains both engraving and cutting, you may wish to pause the job after the engraving component is completed to check if the result is satisfactory before allowing cutting to proceed.
N.B. If the engraved surface is moved atl all, the repeated job will be misaligned with the original. It is best to check the depth of engraving while the surface remains on the cutter, in case another pass is necessary.
Cut lines can also be repeated. Right click the job and select “Repeat Cut Line”. This will repeat only the cut lines of the job.
By Daniel Evans, Fall 2020