Report by Daniel Evans, August 2021
QUICK SETTINGS:
Recommended settings are P 87+, V80-100, PPI 500, 1 pass, 250 dpi using ordered dithering.The distinction between Standard and Photo-optimized is slight, and may not be worth the additional engraving time. Print quality is heavily dependent on proper plate sealing and careful wiping, as the plates wipe out very easily. Images should be curved such that 90-95% grey is the darkest value. Ink mix is dependent on desired results, but 100% black should be the starting point for most applications.
Materials
- Double-thick white collagraph board (A804) was chosen for testing due to its current use by U of A students as a matrix for collagraph plates
- Engraved and cut with a Trotec Speedy 400 laser, Images were prepared using Corel Draw/Paint software and printed through Trotec’s Job control program.
- Images were proofed on Somerset Satin 300g, using a 50/50 mixture of Gamblin Portland Cool Black etching ink and Gamblin Transparent Base. A further test was made comparing 50/50 ink mix to 100% black
Methods
- Testing began using the Trotec job control software’s Cardboard setting as a basis, adjusting to achieve optimal results.The testing focused on the ability to capture a full continuous tone range in an intaglio print from the engraved surface.
- Testing used a greyscale tonal step test to determine optimal settings to capture a full value range.
- Initial tests revealed the cardboard default setting did not have enough power to engrave through the top layer of the board. The power was increased in increments until an optimal engraving depth was achieved.
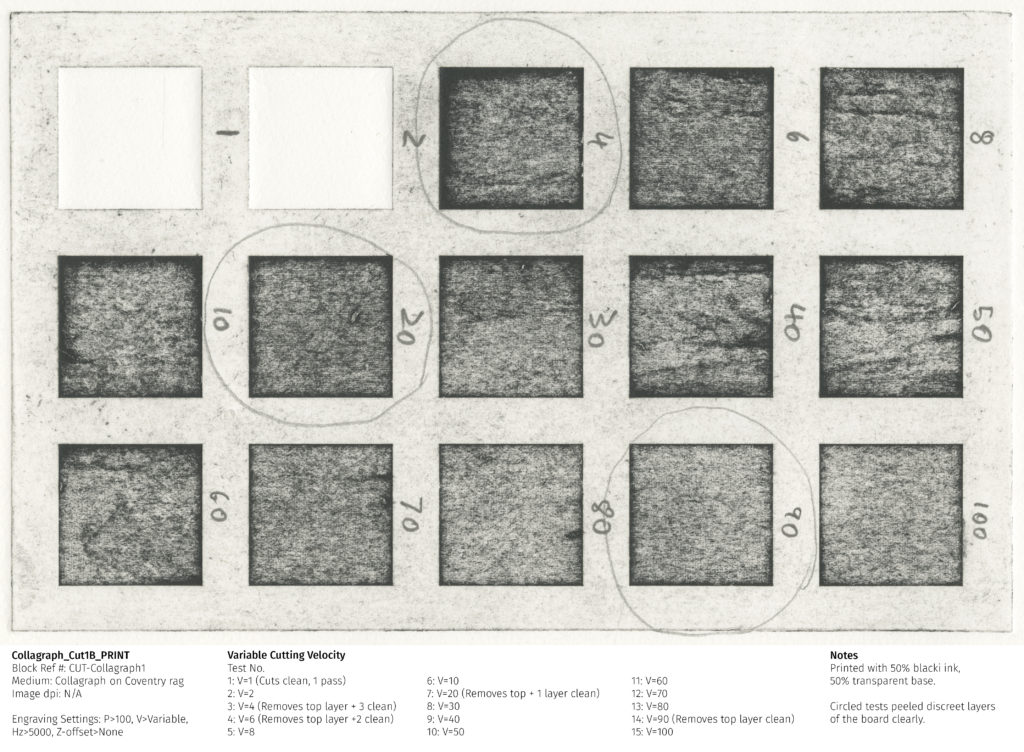
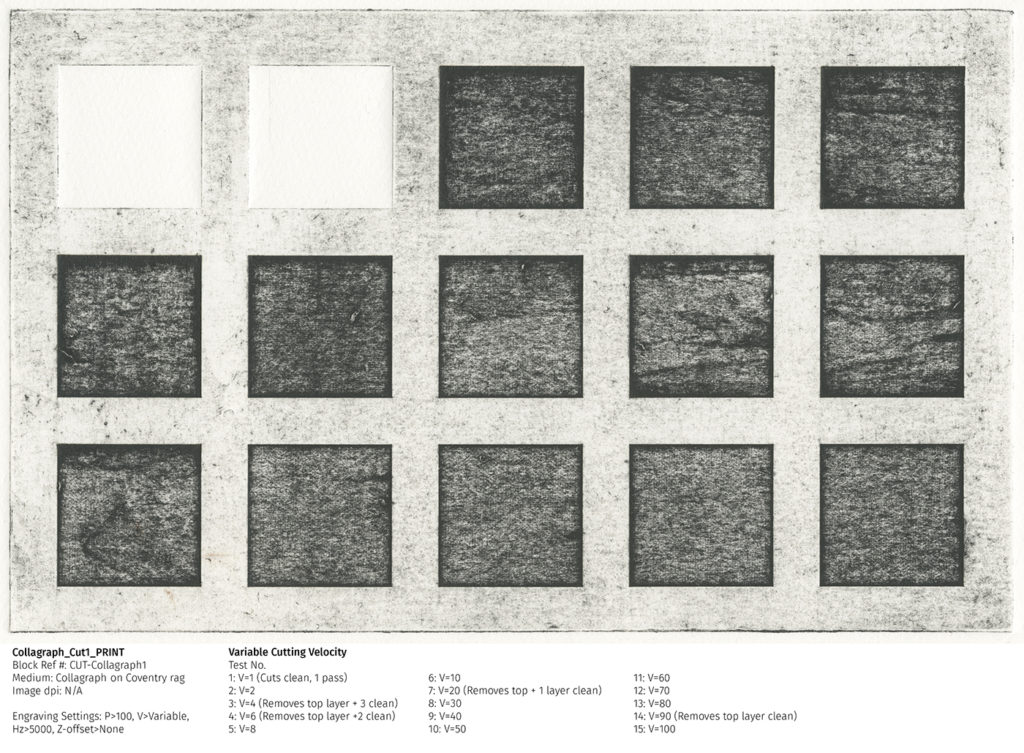
- A supplemental test was done using cut settings to determine if cut-and-peel produced different results at different depths
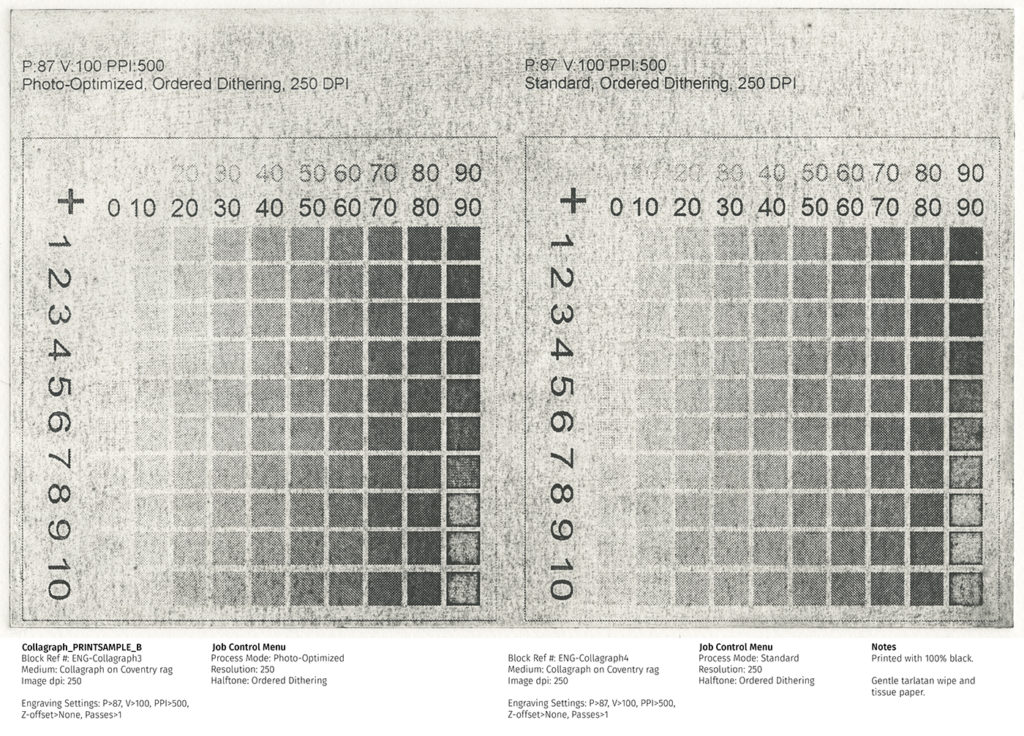
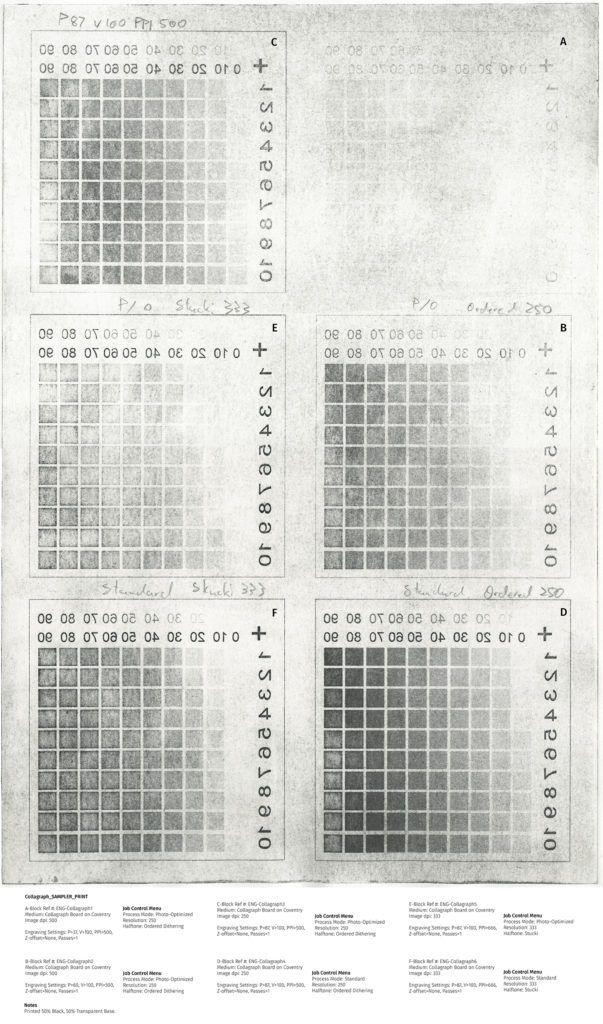
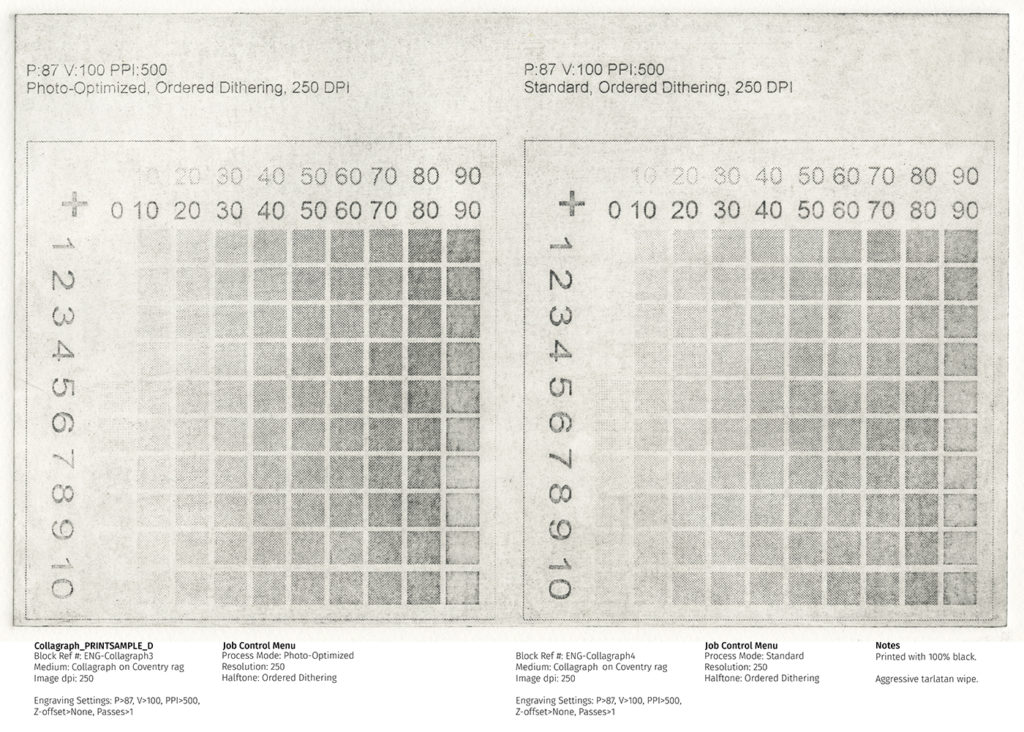
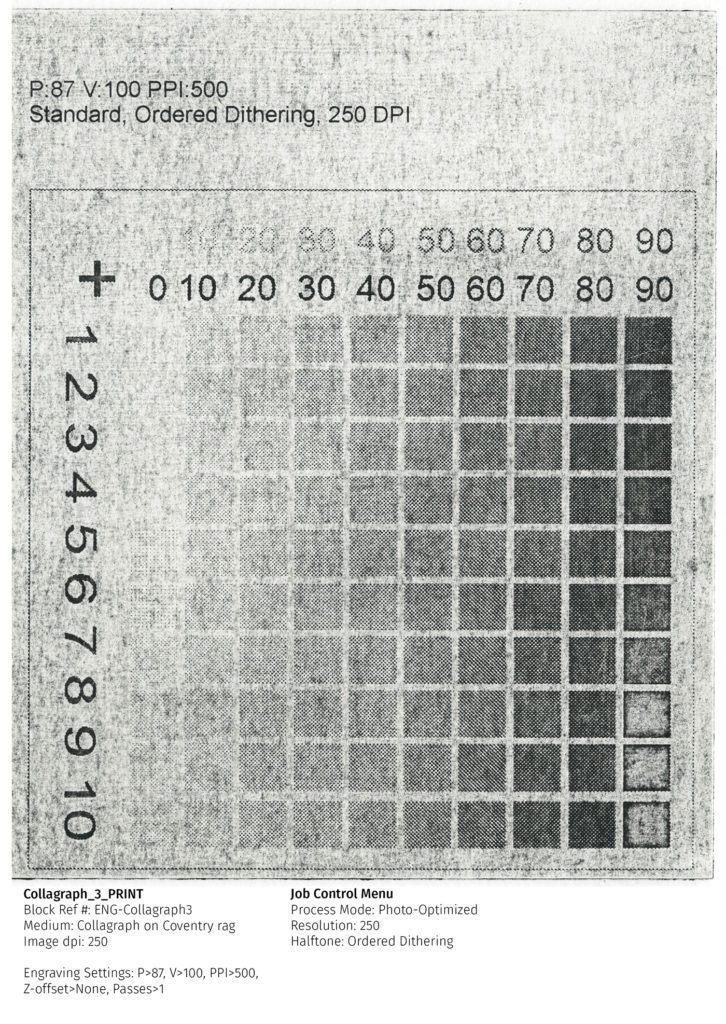
- Initial tests focused on determining which settings would most faithfully capture a full tonal range. To that end, following the guidance already determined in the Woodcut report, test plates were created to compare Ordered Dithering at 250 dpi with Stucki at 333 dpi. Each of these profiles was engraved twice, once using Standard, and once using Photo-Optimized. This allowed a comparison to see which method preserved a more complete tonal range.
- Initial printing revealed that Stucki halftone consistently failed to hold tone. Ordered Dithering worked best with Photo-Optimized, producing a smooth even graduation from plate tone to approx 85-90% black. Minimal change in value was observed between 85% and 95%, with values of 95%+blowing out entirely. A follow up test compared 50/50 black/transparent base to pure black, with the goal of obtaining richer dark values without compromising the rest of the tonal range. This test revealed that 100% black was more effective at holding rich darks, while the 50/50 mix preserved finer gradations in lighter values. The cut test showed little difference between cut-and-peel depths. Certain depths did not permit substrate layers to be peeled away cleanly, leaving patch/ragged texture. Deeper cut depths also produced a thicker ink ridge around the perimeter of the cutout area.
Conclusion
Recommended settings are P 87+, V80-100, PPI 250, using ordered dithering. The distinction between Standard and Photo-optimized is slight, and may not be worth the additional engraving time. Print quality is heavily dependent on proper plate sealing and careful wiping, as the plates wipe out very easily. Images should be curved such that 90-95% grey is the darkest value. Ink mix is dependent on desired results, but 100% black should be the starting point for most applications.