Report by Daniel Evans, August 2021
- A selection of papers available at the U of A art store were tested due to longstanding use in printmaking and ease of access to students. A range of paper weights and compositions were chosen as well (N.B research still in progress, page will be updated).
- Rice Papers:
- Usu Kuchi Light (21g): A196
- Mitsumata (39g): A222
- Kozo Washi (80g): A230
- Kochi (119g): A286
- Rag Papers:
- Somerset Satin 30”x44”: A215 (relief and etching)
- Somerset Satin (soft white): 22”x30”: A220 (relief)
- Coventry Rag 38”x50”: A105 (relief/dry media)
- Hahnemuhle Copperplate 22”x30”: A211 (etching)
- “ “ 31”x47”: A299
- Hahnemuhle German Etching 31”x44”: A300 (etching)
- Fabriano Black: A240 (Holly may have some scraps) (engraving/cutting)
- Stonehenge: A217 (screenprinting)
- Rice Papers:
- Engraved and cut with a Trotec Speedy 400 laser, Images were prepared using Corel Draw/Paint software and printed through Trotec’s Job control program.
Methods
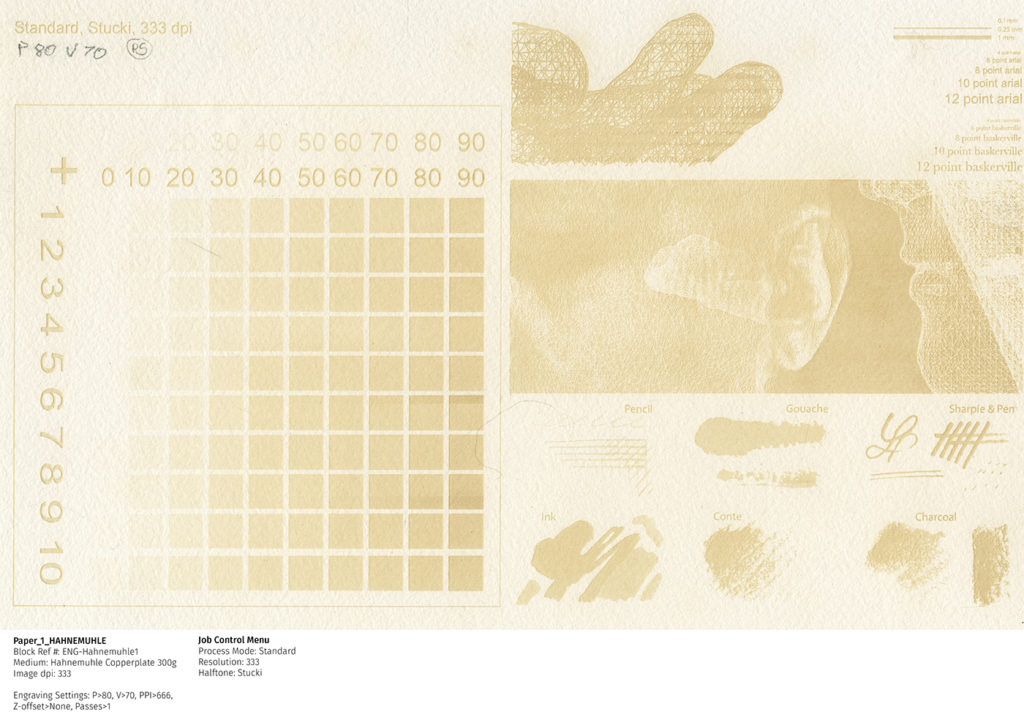
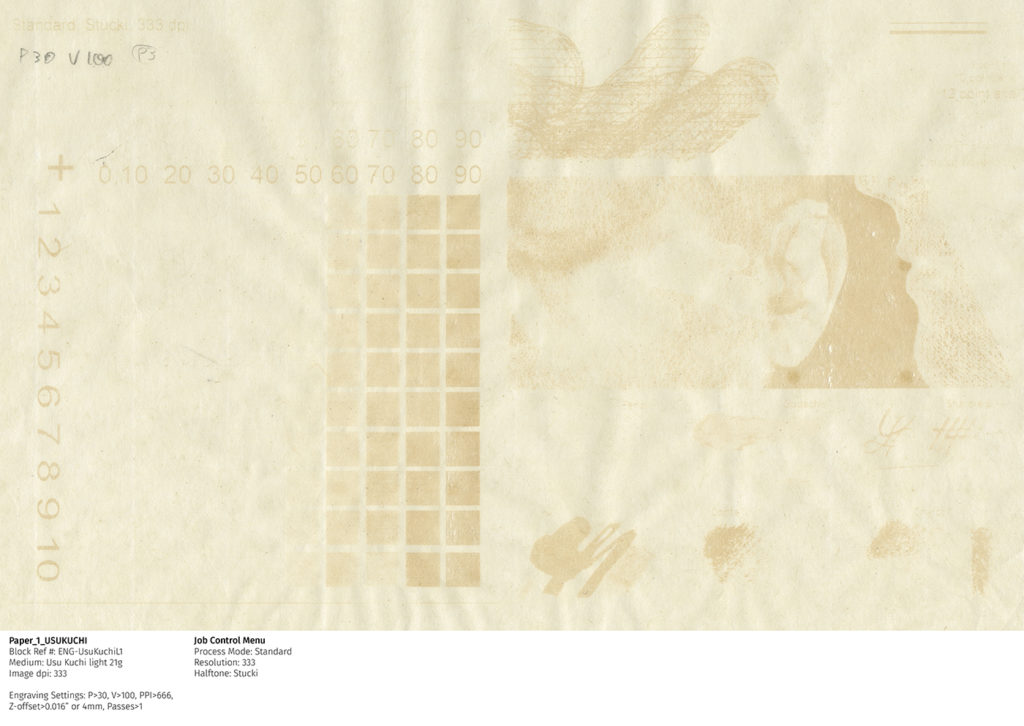
- A composite image combining the Trotec grayscale determination matrix with additional drawn and digital marks was used to explore how the paper responded to a wide variety of marks. The aim of each test was to find an optimal engraving setting that captured the widest variety of marks without engraving completely through the paper. Testing was also done to push the colour transition between engraved and non-engraved areas of the paper. Images used Stucki Halftone at 333 dpi to balance accuracy, resolution, and engraving speed. Comparison between standard and photo-optimized is best determined for each individual use-case
- The three primary variables tested were engraving power, engraving speed, and vertical offset (z-offset).
Notes for specific papers follow:
Kochi – Initial setting was derived from the Coated Paper setting (P 47.81, V 100), but proved not strong enough to hold the full tonal range. Increasing the power to 60 produced good results, with minor information loss in the lighter value range (0-20). Adding a 0.24” (6mm) vertical offset produced a noticeably stronger change in tone, with values above 60% grey appearing significantly darker. However, values below 50% grey almost entirely disappeared, and there was some loss of image clarity
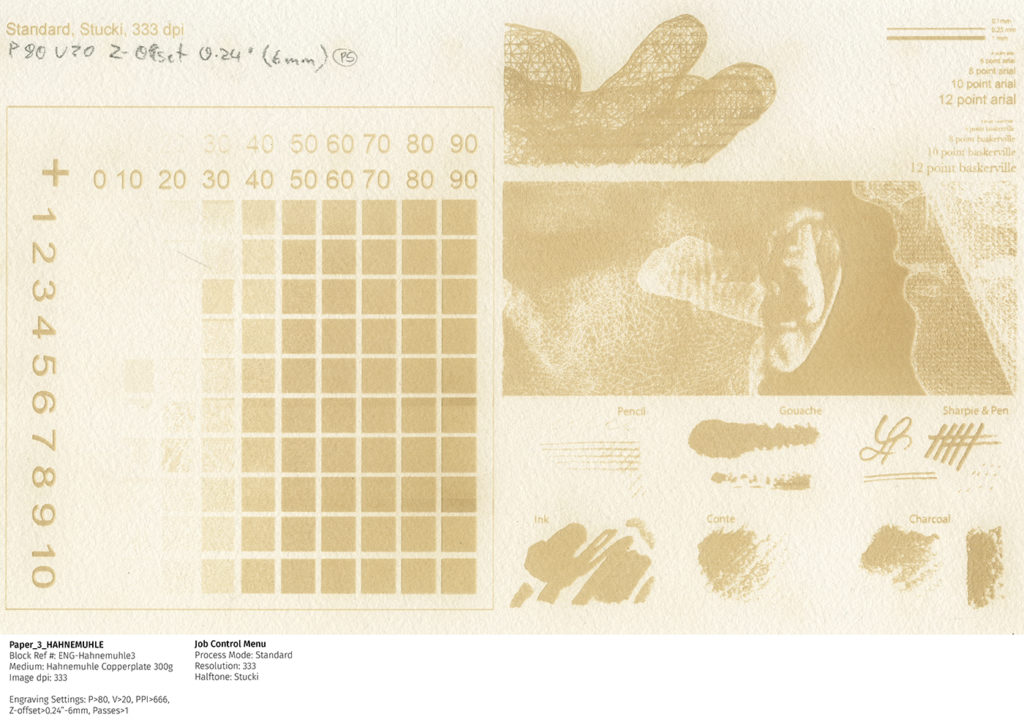
Hahnemuhle – Initial setting used the parameters developed for Kochi as a base. P 60-80 with V 100-70 all produce good results, depending on desired engraving depth and tone balance at the final image. Preserving shadow detail in darker images favour less power with higher speed, while reclaiming information in lighter images can be achieved by increasing power and/or reducing speed. Adding a 0.24” (6mm) vertical offset produced a noticeably stronger change in tone, with values above 60% grey appearing significantly darker. However, values below 50% grey almost entirely disappeared, and there was some loss of image clarity
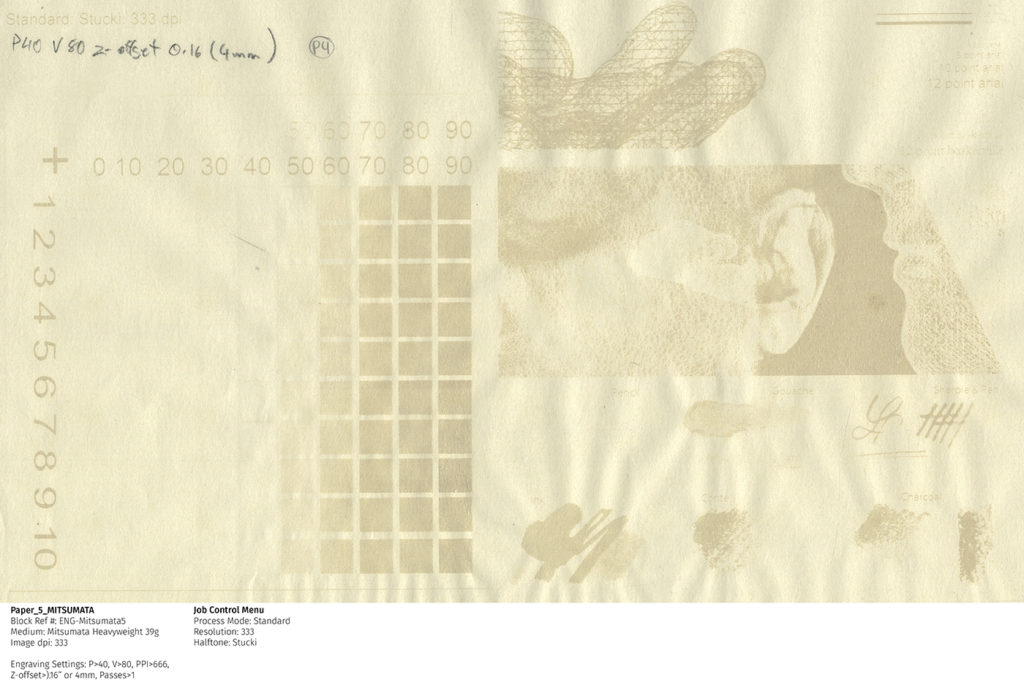
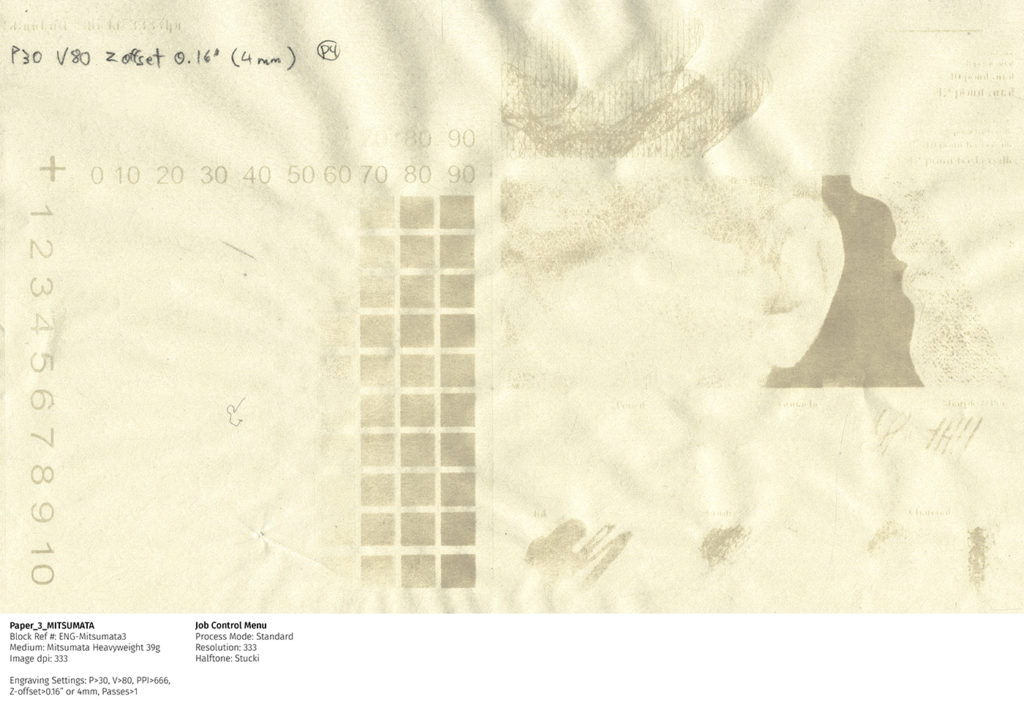
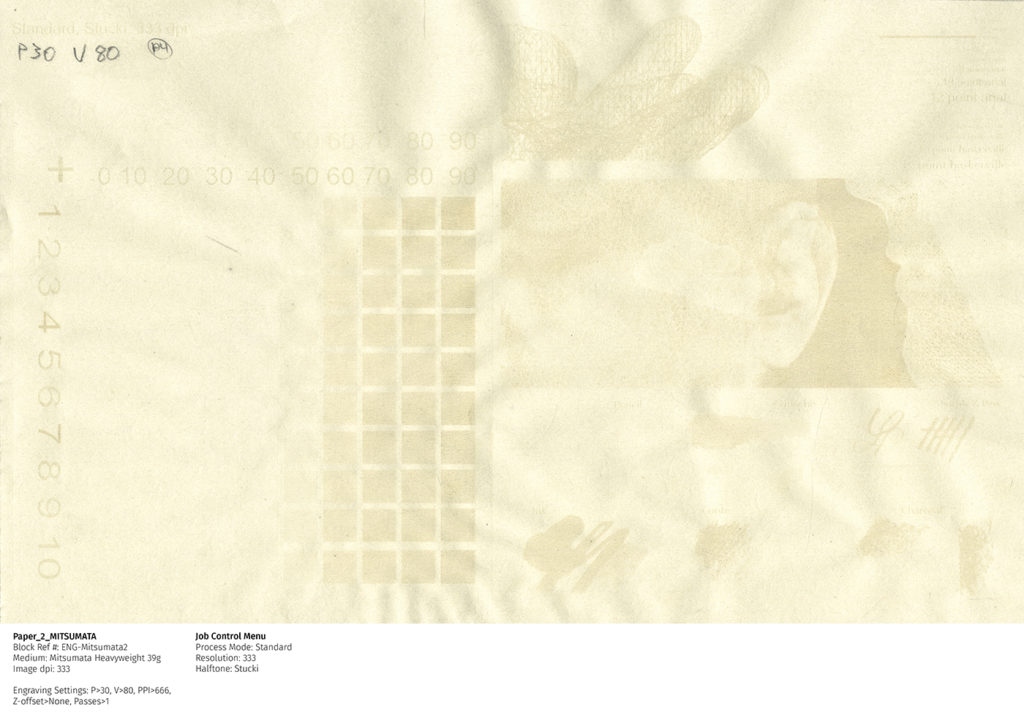
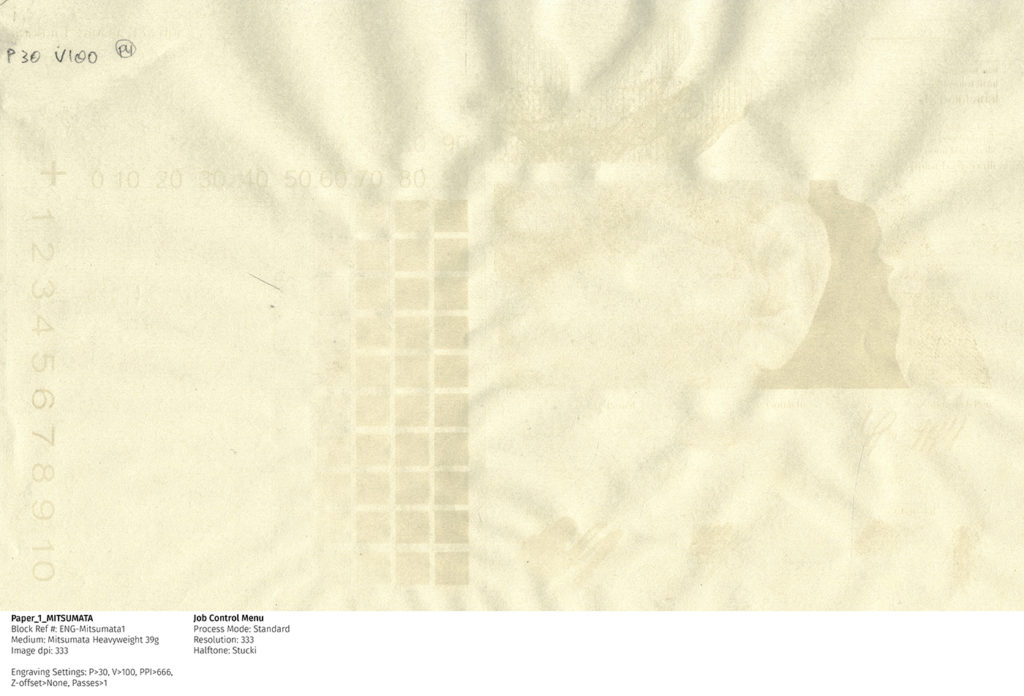
Mitsumata – P 30 V 100 was chosen as a starting point due to the paper’s delicacy. Very little was visible after the first test. Reducing speed to 80 produced a slightly more noticeable result, but also threatened to engrave through the paper. Adding a z-offset value allowed for the engraving to become more visible, with 0.16” (4mm) producing the best results.
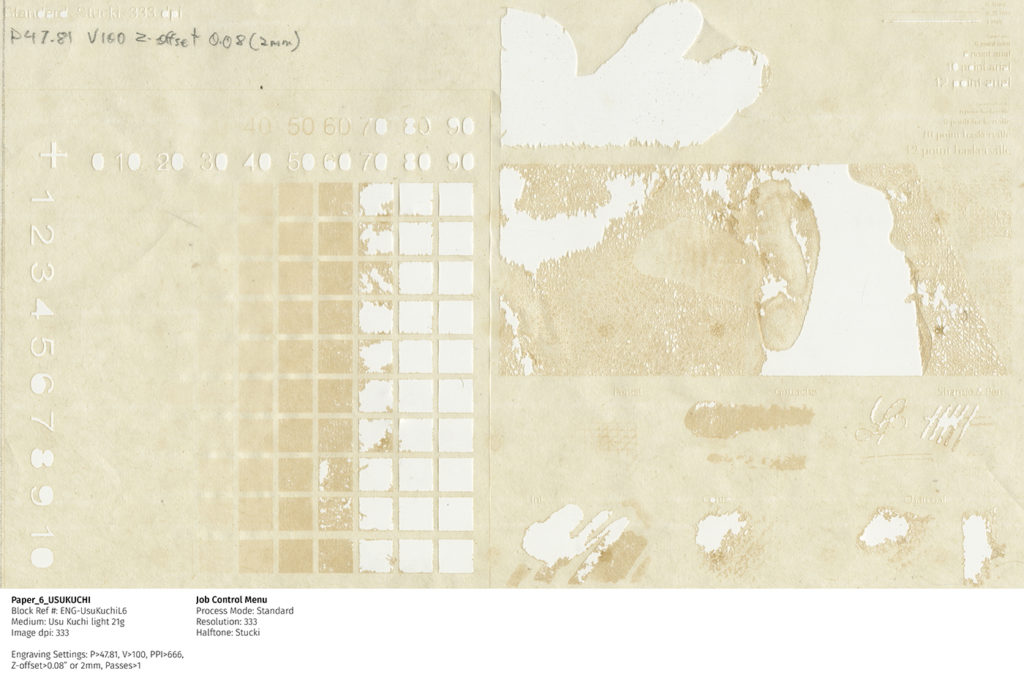
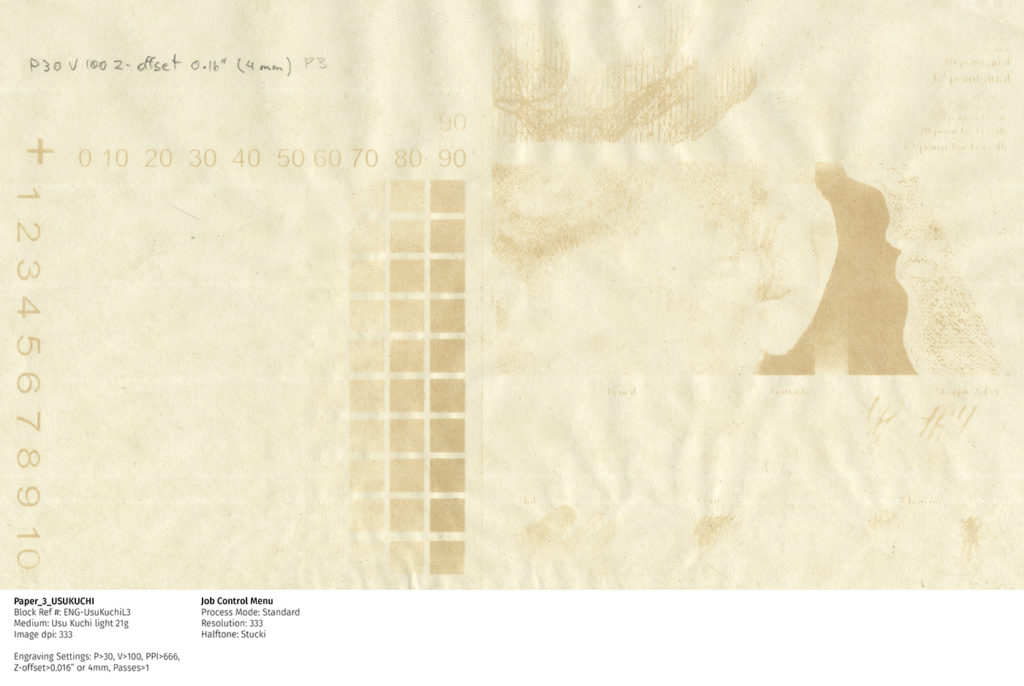
Uzu Kuchi – P 30 V 100 was chosen as a starting point due to the paper’s delicacy. Very little was visible after the first test, though more than the Mitsumata. Increasing power to the Coated paper setting (P 47.81) engraved completely through the paper, leaving behind a delicate lattice of marks. Adding z-offset to the initial setting of P 30 V 100 produced much more visible results, with 0.08” (2mm) producing the best combination of clarity and tone. This also severely compressed the tonal range of the image to between 60% and 100% grey.
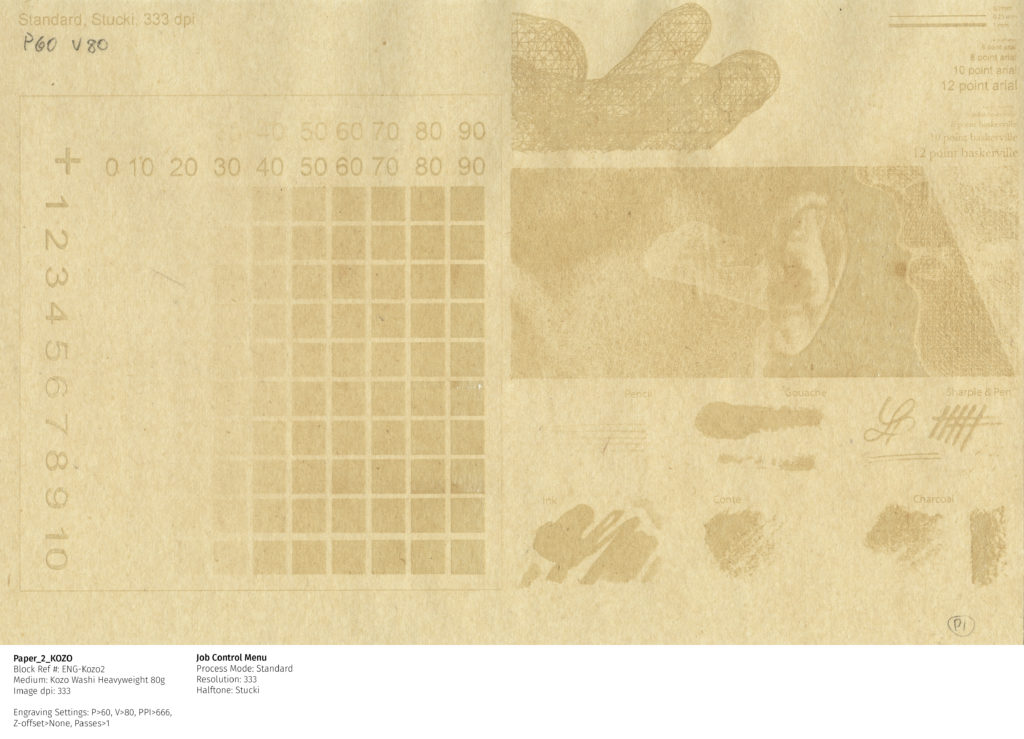
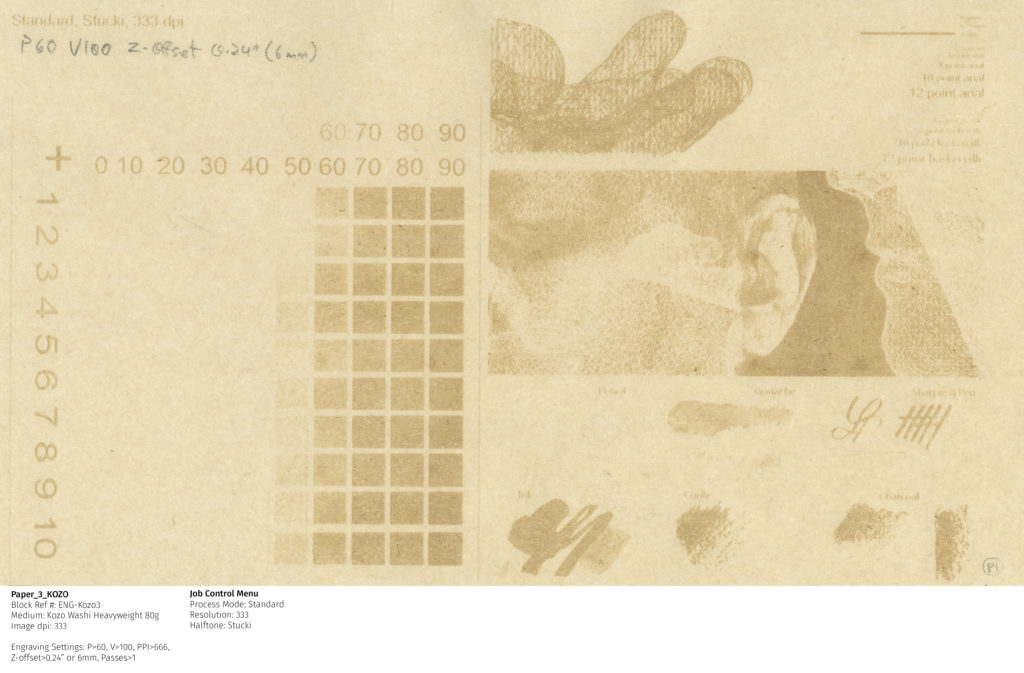
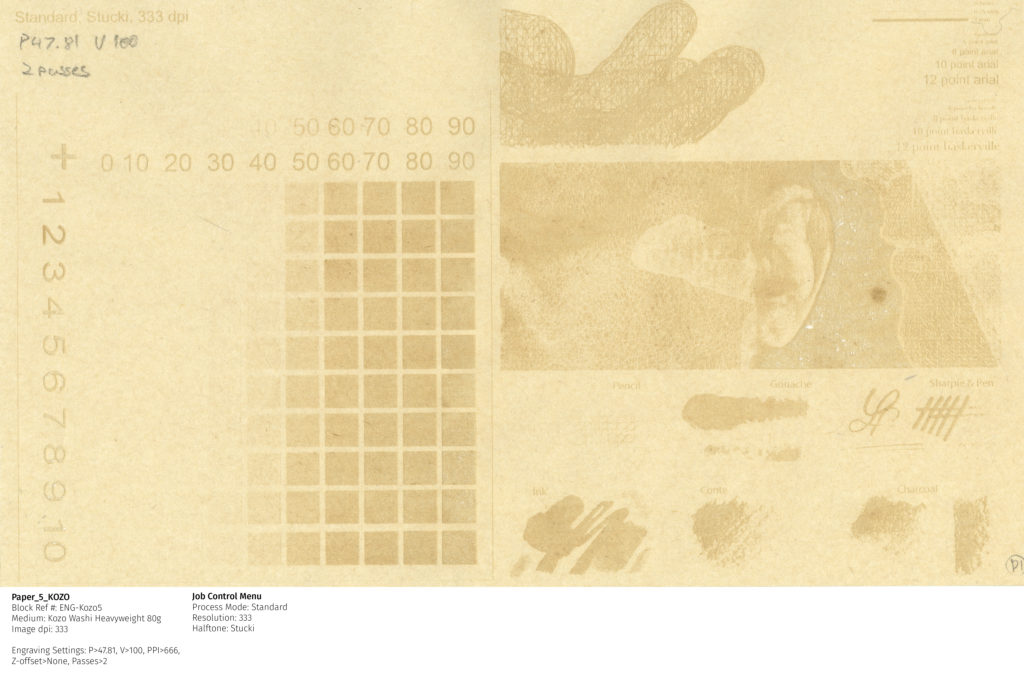
Kozo Washi – P 60 V100 was chosen as a starting point due to the paper’s durability. This setting nicely captured a full tonal range, with some losses in the upper values (0-20% grey). Lowering the speed to 80 produced a stronger colour change and an even more expanded mid- and high- value range, at the expense of a slight flattening in the value range from 80-100% grey. Adding a z-offset produced a noticeably stronger colour change, with the now predictable loss of values below 50% grey
Conclusion
Recommended settings for specific papers follow (all images had a resolution of 333 ppi and were engraved at a resolution of 666 dpi ):
- Kochi – P 60, V 80-100. Z-offset of 2-6mm can be added to increase contrast at the expense of values less than 50% grey and some image clarity

- Hahnemuhle – P 60 – 80, V 70-100. This paper has a wide engraving latitude, and best settings will be image dependent. Z-offset of 2-6mm can be added to increase contrast at the expense of values less than 50% grey and some image clarity


- Mitsumata – P 30, V 80-100. This paper struggles to hold a full tonal range, and is less than ideal for engraving. Even with z-offset, results are very subtle.


- Uzu Kuchi – P 30, V100. This paper has an extremely narrow engraving latitude. P < 25 will not show up, while P > 35 will engrave through the paper (which may be desirable for lattice effects). Z-offset of 2-6mm can be added to increase contrast at the expense of values less than 50% grey and some image clarity.


- Kozo Washi – P 60, V 80-100. Z-offset of 2-6mm can be added to increase contrast at the expense of values less than 50% grey and some image clarity. This is a durable and well performing paper, producing striking results with P 60 V 80 on images curved such that the darkest value is 90-95% grey.
Notes on Z-offset:
The rationale for z-offsets over power adjustments is that it produces more of a colour change, while removing less material. Trotec recommends z-offsets for things like producing colour changes in wood, and I found it to be effective for paper as well. The idea is that when the laser is focused on the surface, most of its energy goes into vaporizing material at the focal point without affecting surrounding material too much. Colour changes happen when there isn’t enough energy to fully vaporize material, so it toasts instead without boiling away. The z-offset unfocuses the laser just enough so that its energy is spread out over a larger area, toasting the material without boiling too much of it away. It will affect image quality slightly, but unless the image is full of hairlines it’s hard to notice. It can also result in lighter areas not engraving at all, since most materials seem to have a power threshold below which the laser doesn’t really do anything.